building an automatic CD ripping machine
Written by Sebastian Dümcke on
I want to help digitize my parents CD collection. For that I set out to build a simple machine dedicated to the task and automate it as much as possible. Something I always wanted to do. I started out ordering a set of 5 random DVD-ROM drives on eBay. Turns out, that was the simple part.
The build
My inital idea was to run the whole thing with my old NAS board, a custom NAS SBC called helios4, with incidentally 4 SATA ports which would allow me to run 4 drives. However, once I plugged the drives into this, the lights flashed and their trays opened and closed. Upon reflection and research, a DVD-ROM drive draws more power than a hard-drive (3-5W for a disk, up to 20-30W for a DVD drive during operation) and the custom SBC was probably not designed around this. So, I got a cheap 200W PSU off eBay. I connected the power cables to the PSU and the data cables to the helios4. Here something weird happened: the SBC would loose network connection with the SATA cables plugged in but was available with nothing plugged in. This could be connected to reason I retired it as a NAS board in the first place. So back to the drawing board. I still had 5 drives, of which I could power 4 drives with the PSU (because it has 4 SATA power cables. I would need to purchase a molex->SATA adapter for the fifth drive). How can I read the data from these drives? Online I found a SATA multiplier with USB-C adapter which I promptly ordered aas it seems to solve all my issues. When it arrived, I realised the product was basically a M.2 SATA 1-to-5 multiplier stacked atop a M.2 to USB-C adapter board. Long story short, while the operating system would recognise the multiplexer and USB bridge, when I plugged in the drives it failed to recognize them. So I sent the adapter back. At this stage I pondered simply purchasing several external CD-drives. Most SATA->USB adapter are designed for hard drives and to deliver both power and data. Using those would mean having to power them all separately with 12V. Not an option. Finally I found SATA “data only” to USB 2.0 adapter. Even better the product description mentioned explicitely that they are compatible with CD/DVD drives (and not just hard drives). I ordered, waited for delivery, connected one and it showed up as a DVD drive immediately. Success. Here is the final BOM of the build:
| Item | Price (€) | Source |
|---|---|---|
| 5 DVD-Rom drives | 29.99 | eBay |
| 7 SATA cables | 7.64 | Amazon |
| 1 200W PSU | 17.10 | eBay |
| 5 SATA to USB data only | 42.55 | eBay |
| 1 Molex to SATA | 3.70 | eBay |
| Total in Euro | 100.98 |
I hoped to stay under €100 for the total build which succeeded.
My haul of the mystery drives was as follows:
- 2x TSSTcorp DVD-ROM TS-H353C FS02 SCSI CD-ROM
- 2x TSSTcorp DVD-ROM SH-116BB FT00 SCSI CD-ROM
- 1x HL-DT-ST DVD-ROM DH40N (LG Electronics)
In the end all drives are connected to a 5 port USB 3.0 hub that I plug into my laptop for a semi-portable setup. A single drive does not saturate a USB 2.0 connection (the bus speed of the SATA->USB adapter) and without running the numbers I believe that 5 USB 2.0 connections will not saturate a single USB 3.0 connection. See pictures at the end of the post.
The Software
This part was easier. According to my research EAC is the de-facto standard for ripping CDs on Windows. Linux alternatives are whipper and cyanrip, both packaged in guix. I chose cyanrip. Inspired by this blog post I created the following script inside a file rip.sh:
DRIVE="$1"
cyanrip -d ${DRIVE} -s 6 -R 1 -G -U -D "CD-Rips/{album_artist}/{album}{if #totaldiscs# > #1#/CD|disc|}" -F "{track}{if #artist# != #album_artist# - |artist|}-{title}"
eject ${DRIVE}
All my drives have the same offset (+6) so I did not have to worry about this (see parameter -s 6).
This programm rips the CD to FLAC, stores it under a directory tree according to my liking, always grabbing the first option from Musicbrainz. Finally whether the rip was successful or not, it will eject the drive. The idea is now to start the script every time one closes the CD tray. This way all that has to be done manually is to remove the previous disc, insert a new one, close the tray, walk away.
For this to work I changed a udev rule from here:
echo "SUBSYSTEM==\"block\", SUBSYSTEMS==\"scsi\", KERNEL==\"sr?\", ENV{ID_TYPE}==\"cd\", ENV{ID_CDROM}==\"?*\", ENV{ID_CDROM_MEDIA_TRACK_COUNT_AUDIO}==\"?*\", ACTION==\"change\", RUN+=\"/bin/su -lc '/absolute/path/to/rip.sh %E{DEVNAME}' <user>\"" | sudo tee /etc/udev/rules.d/80-audio-cd.rules
You need to change the user to run the rip.sh script from and the path to the script.
You can reload the udev rules by running udevadm control --reload-rules as root.
Should you drive have different offsets, you would need to pass the model number from udev to the script and assign the correct offset via e.g. an associative array.
This worked as expected. Some disc would be ejected rapidly, these are ones that could not be automatically ripped. After processing all discs, I ran these manually again to get the output from cyanrip. To do that I had to temporarily remove the udev rule. A few discs did not yet exist in Musicbrainz, so I added them myself (giving back to the community). In some cases there was a Musicbrainz release group but the particular pressing of the CD (as per the CD-TOC) was not yet associated with it. So I did that. Yet for others cyanrip would not find the right Musicbrainz ID. Unfortunately, providing the ID via the command-line -R switch did not work, but failed with a cryptic error message that concludes with This Error should not happen. Instead of investigating I simply ripped them as Unkown album/tracks, then when importing the whole collection into beets put in the correct Musicbrainz ID there. I did the same for discs present in discogs but not Musicbrainz.
To import of the FLAC files into beets I used the beet import command with the “as is” switch.
The 3D printed case
To tidy things up and make the whole thing as portable as possible I 3d printed a case that keeps the drives, PSU and cables together. I share the STL file and since you will probably not have the same PSU dimensions, I also provide the scad file for those that want to adapt the design. In the end it looks as follows:
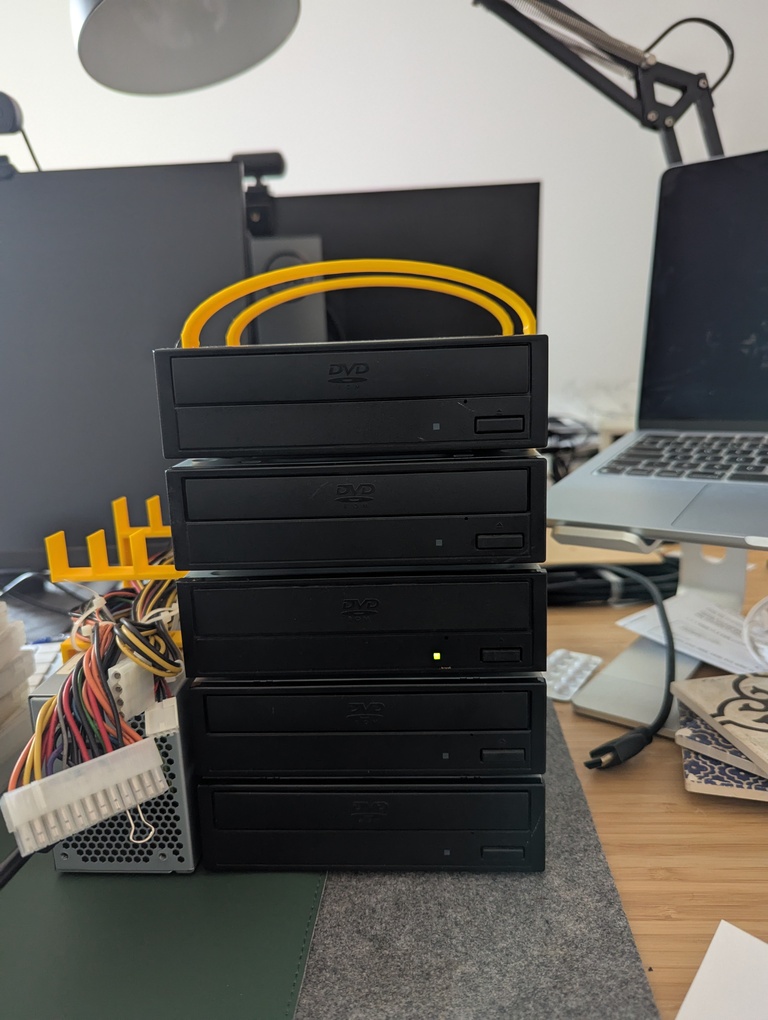
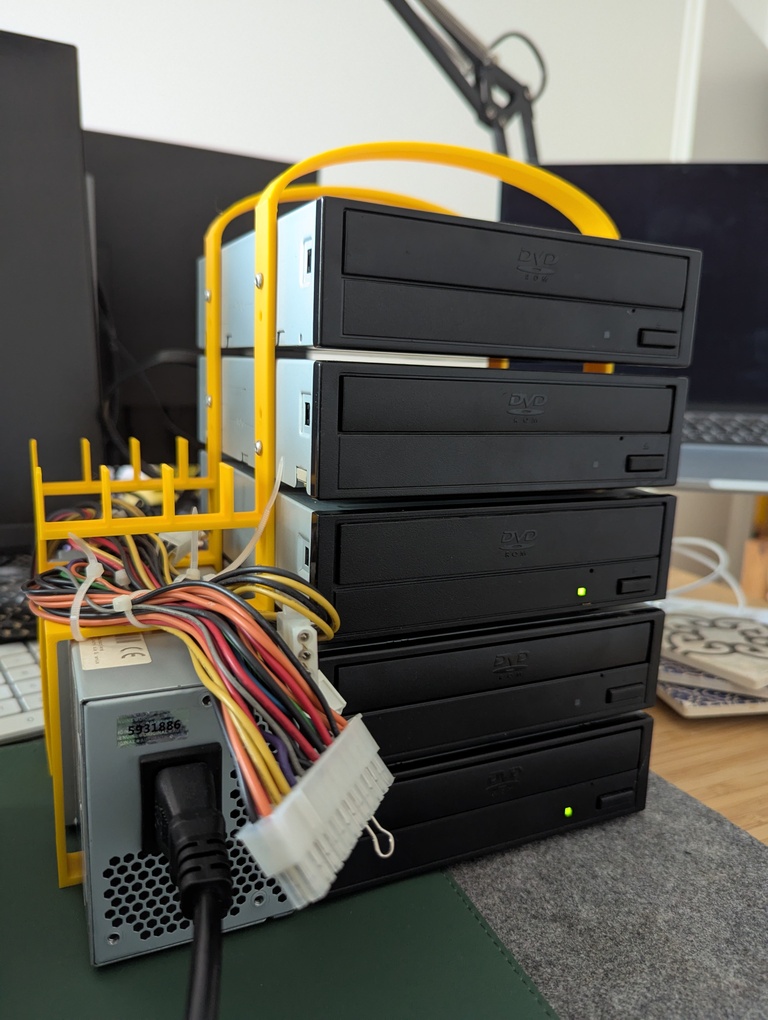
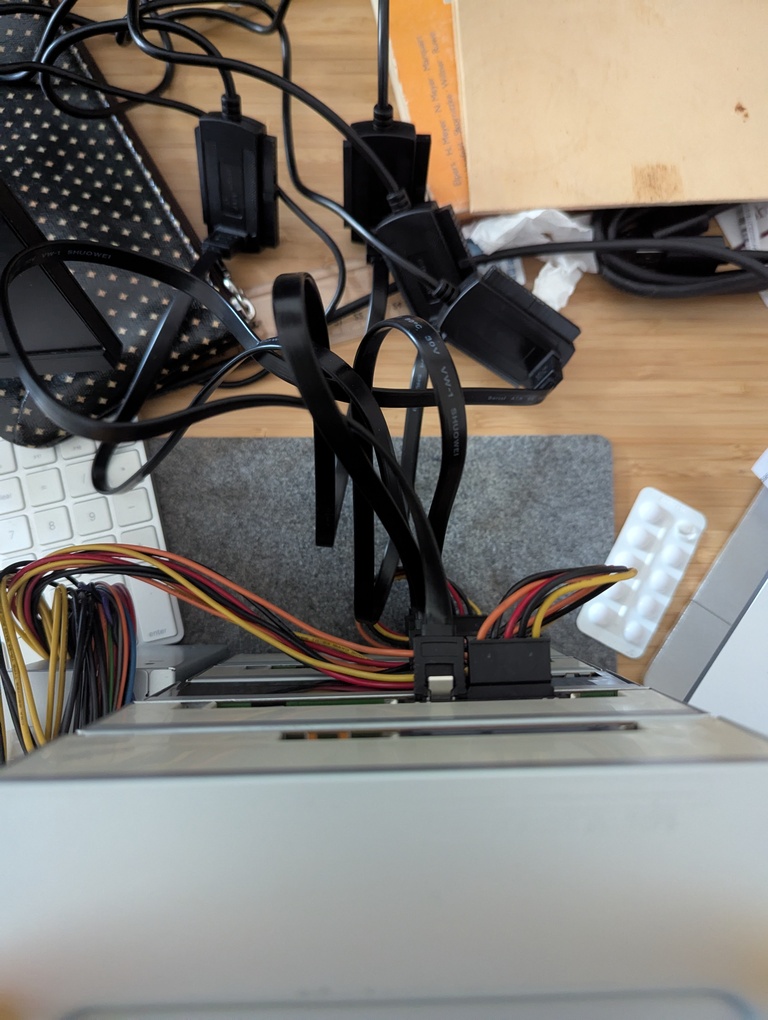
The design has two handles at the top for transport, and uses as little filament as possible. The PSU is fixed with zip ties, the drives are using 8 M3 screws per drive. Then there is the whole cable mess from the different adapters, SATA data cables and such. Not pretty but it works.