Ba3dp: A Fresh Start
Written by Sebastian Dümcke on
Tags: 3dprinting
Background
I got unlucky with AliExpress (the twotree speciality store), where I ordered all parts apart from extrusions. Rails came first after 3-4 weeks, but in the wrong size (instead of 3x300mm I got 1x400mm and 2x450mm). I then used the function for reclamation and got 12 euros back. The rest did not come at all. In the shipping tracker I saw that the order was actually returned to the warehouse. But now, since I had already the arbitration button, I could not open another case even though it related to a different shipping. So I got nothing but 3 rails of the wrong size. That was quite discouraging and put me off my project to build a 3D printer for quite some time.
Until recently, when a friend a mine replaced his stock extruder and hot-end for a direct-drive on his Ender3. Turns out the extruder motor on the board got fried. So he left me the board and the old extruder with broken thermistor. I gave him the SKR E3 mini board. This left me with a few more parts and incited me to go back to the idea of building a 3D printer.
First, let’s tmake inventory of all parts I have available:
- 1 hot-end with clogged nozzle and broken thermistor from Ender3
- 1 hot-end with fried heater cartridge form the CTC i3
- 1 brand new all-metal E3Dv6 hotend with dual-drive BMG extruder
- 1 creality Ender3 mainboard with broken Extruder Motor driver
- 1 ATMEGA 1264P board from the CTC i3 with fried hot-end plug
- 1 metal extruder drive
- 1 heated bed 210x210mm
- 1 12V 20A power supply
- 1 CTC i3 LCD screen (have not looked up the interface/driver)
- 6 stepper motors
- 2 300mm 8mm threaded rods with 5mm ends form CTC i3
- 2 450mm linear rails MGN12H
- 1 400 mm linear rail MGN12H
- 2 350mm 8mm smooth rods
- also a nice piece of glass, 384x274mm
So what does that spell in terms of a printer build? Using the Klipper firmware we can use both boards together, with a total of 7 working motor drivers, 6 end stops and 3-4 thermistors, 2 heated beds and 1 hot-end. I can probably re-purpose the 12V bed input for a 12V hot-end heater as well.
So now that is figured out let’s dream about some options with 6-7 motors:
- IDEX, heated bed with single Z axis: 6 motors (1Z, 1Y, 2X, 2E)
- Single extruder, heated bed, triple Z for true auto levelling: 6 motors (3 Z, 1X, 1Y, 1E)
- Dual-extruder but not IDEX, dual Z: 6 motors (2 Z, 1X, 1Y, 2E)
I am most interested in 1 and 2. 2 will mean a structure where the Y axis is not moving the bed. For 1 I still have to research my options. Also I wonder if my motors have enough torque to move the X gantry if both threaded rods are belted together.
Update 2021-05-28:
Having thought about it, I do not see myself using different materials or colours in my prints. But I do struggle with bed levelling. So having automatic bed levelling using independent z axes is of interest to me.
So on to further planning:
Structure
Cube with bed moving in single direction. While in my previous post I wanted to try a CoreXY kinematic, I kind of shy away from it when having to design my own. I am now looking into a standard Cartesian configuration similar to the Ender 5.
Z-axes
So this design will have 3 independte Z axes for true auto bed levelling. My current hope is to re-use the following design from Thingiverse.
X axis and gantry with hot-end assembly
I am hoping to use the design of the EVA platform. That would remove the need to design all the parts for the hot-end, extrude motor…
Y axis
Here I plan to take inspiration from the Ender 5. Using a stepper motor with double shaft, that turn two belts at the same time. These belts that drive the X gantry in the Y direction.
Bed
I want to use the piece of glass I have that should fit the size of printer. I read somewhere that it is possible to print both PLA and PETG without a heated bed. So we will give this a try. This should greatly simplify the bed. I am wondering whether I should have a kinematic mount for the bed? Would that help with the levelling? I certainly do not need it for thermal expansion if I leave off the heated bed. I am thinking in the worst case I can still attach my 200x200 heat bed under the glass bed and only print in the middle for heated prints.
Update 2021-06-02:
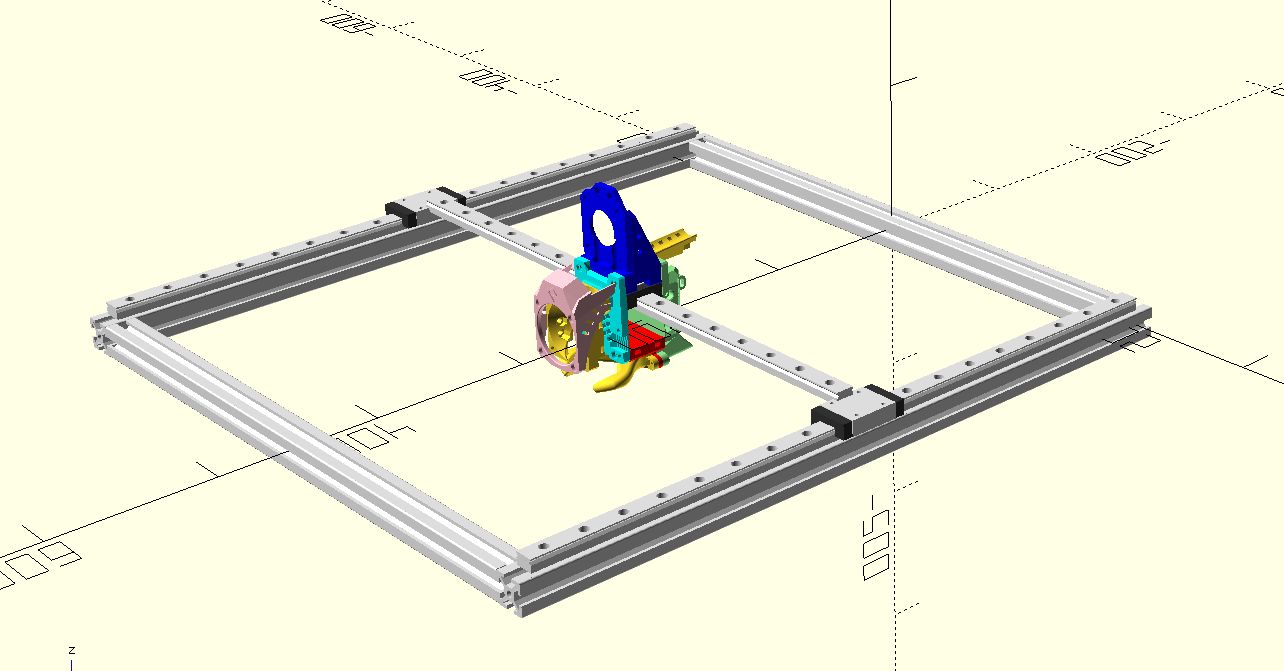
I found time to CAD out the top of the printer including the EVA mount using OpenSCAD with the NopSCADlib providing all the parts. Looks like the belt would be too low (below the rail), removing the option to use the EVA platform.
